A Complete Guide for Aluminium Formwork
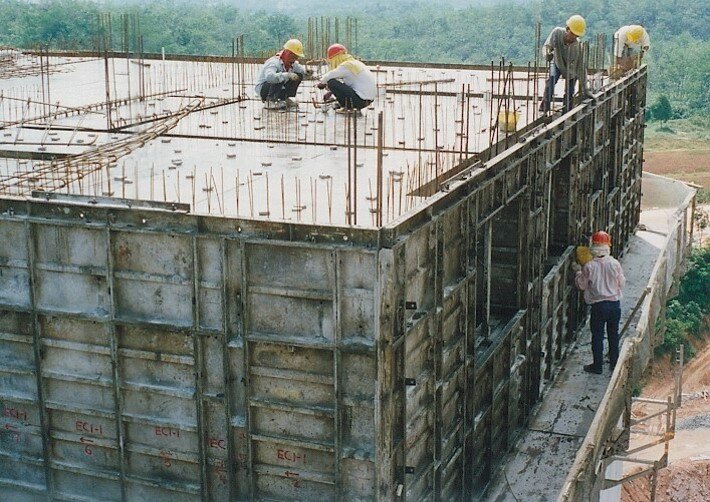
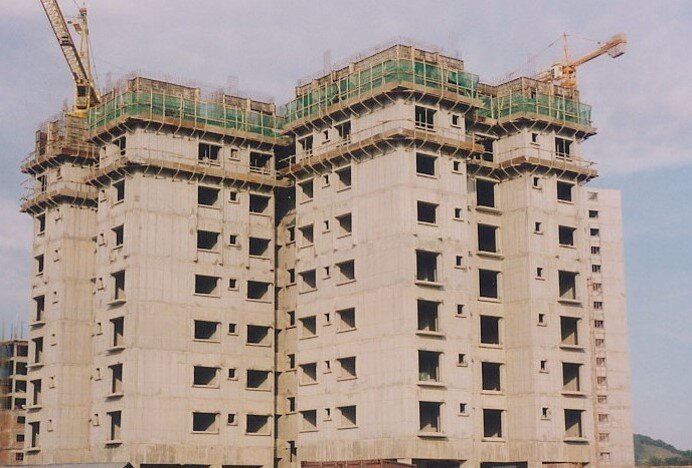
Now a days Aluminium forwork is more popular due to its light weight and high strength properties. also it last long and gives more repetitions compare to the conventional formwork system. When we go for a aluminium formwork system, there are many things which need to look into it.

This complete guide on aluminium formwork will give information of following;
Formwork Drawings
Shell Plan Layout
Formwork layout drawings,
- Wall panel Layout,
- Slab Panel Layout,
- Starter Block Layout,
- Corner Layouts,
- Beam Panel Layout,
- Soffit Layout,
- Staircase Layout,
- Bracket and Soldier layout,
- Miscellaneous Layout which includes sunken portion, upstand portion
etc,
Worksite Management
- Logistic
- Manpower
- Safety
- Accessories & Tools
Assembly Process of Aluminium Formwork
- Setting Up Level & Marking Of Position
- Formwork Panels
- Installation Works of Rebar, M&E & Plumbing
- Assembly of Wall Formworks
- Assembly of Beam & Slab Formworks
- Assembly of External Working Brackets
- Identification of Formwork Assembled
Concreting Process for Aluminium Formwork
- Pre-Check Before Concreting
- Monitoring During Concreting Process
Dismantling Process
- Dismantling of Wall, Column & Beam Formwork
- Dismantling of Slab Formwork
- Removal of Flat Wall Tie & Wall Tie Sleeve
Assembly Process of Aluminium Formwork in detail along with photographs

Dismantling Process of Aluminium Formwork in detail along with photographs
Activities shown in Flow Chart are;
Now a days Aluminium forwork is more popular due to its light weight and high strength properties. also it last long and gives more repetitions compare to the conventional formwork system. When we go for a aluminium formwork system, there are many things which need to look into it.

This complete guide on aluminium formwork will give information of following;
Formwork Drawings
Shell Plan Layout
Formwork layout drawings,
- Wall panel Layout,
- Slab Panel Layout,
- Starter Block Layout,
- Corner Layouts,
- Beam Panel Layout,
- Soffit Layout,
- Staircase Layout,
- Bracket and Soldier layout,
- Miscellaneous Layout which includes sunken portion, upstand portion
etc,
Worksite Management
- Logistic
- Manpower
- Safety
- Accessories & Tools
Assembly Process of Aluminium Formwork
- Setting Up Level & Marking Of Position
- Formwork Panels
- Installation Works of Rebar, M&E & Plumbing
- Assembly of Wall Formworks
- Assembly of Beam & Slab Formworks
- Assembly of External Working Brackets
- Identification of Formwork Assembled
Concreting Process for Aluminium Formwork
- Pre-Check Before Concreting
- Monitoring During Concreting Process
Dismantling Process
- Dismantling of Wall, Column & Beam Formwork
- Dismantling of Slab Formwork
- Removal of Flat Wall Tie & Wall Tie Sleeve
Assembly Process of Aluminium Formwork in detail along with photographs
- Form Release agent (Solvent based) to be applied on the surface of all the panels before the assembly process.
- Outer Corner is fixed to External Wall Corner panel by round pin and wedge.
- Inner Corner is fixed to the Internal Wall panels by round pin & wedge. The Internal and External Wall Panels are hold by Flat Tie with Tie Bar Shield in between the panels.
- Repeat Sequence No. 3 to complete the assembly of both the Internal and External Wall Panels.
- Install Slab Corner on the top portion of the Wall Panels with round pin & wedge.
- Aluspans mid beams / end beams and Prop head are combined by Beam splice bar with long pin and wedge at the bottom section.
- Start the assembly of the Slab Panels from the Slab corner Internal. Subsequently, fill out the whole slab area by pinning the slab panels together with the Aluspans (Comprises of Aluspans and cantilevers). Mid Beams / End Beams.
- Additional Wall Panels (or Kickers) are fixed to the external Wall Panels to raise to the appropriate height to contain the slab concrete when it is poured.
- Upon completion of the installation and fixing of the Wall and Slab Panels, a numbering sequence will be made for each of these panels with color identification scheme to differentiate each of the unit area such as bedrooms, living room, bathroom etc. This numbering and color identification scheme will ensure that each panels can be determined as to their exact location once they are transferred to the next level for installation.
- Always ensure that wall ties, pins and wedges are properly installed and secured before pouring concrete into the forms. Ensure that concrete pouring is distribute evenly throughout the Wall Panels section before commencing to cast the slabs level area.

Dismantling Process of Aluminium Formwork in detail along with photographs
- After 12 hours, remove the Internal Wall panels by knocking out the wedges and pins. The Wall Panels are to be moved to upper floor through the slab opening as shown. The transferring of the panels should be done in a systematically and orderly manner to ensure that the next cycle or level is not affected. Since all the panels are numbered with different colour identification scheme, these transfer process can be determined and planned in advance according to section of the building such as Room 1, Room 2, Bathroom are etc.
- After removing the External Wall Forms (the starter Block (kicker) should remain undisturbed), the dismantled wall forms are moved to upper floor. Access Scaffolding is use for transferring of external wall panels from the ground floor level. For level 1 and above, an external working platform is fixed to the external wall. The external wall forms from level 1onward shall be supported by the kickers. (These steps are to be repeated from one floor to another floor.)
- After removing the Wall Panels, proceed to the Slab Panels after 36 hours by removing the long pins and wedges on the joint bars the end and middle beam section.
- Upon removing the Aluspans Mid Beams and Aluspan cantilevers End Beams, the prop shall remained undisturbed during this process to support the concrete slab.
- Proceed to strip the Slab Panels and transfer to the next level according to the designated area and installation sequence.
- Strip the Slab Corner.
- Pull out Wall flat Tie using Wall Tie puller and remove the Wall tie sleeve using Nose player.
- When the cube tests show that the slab concrete is sufficiently strong, the prop together with the prop heads are removed and transferred to the next level.
Activities shown in Flow Chart are;
- Receive Aluform materials.
- Packing list, BOQ, and Formwork layout.
- Tools.
- Additional accessories.
- Visual inspection.
- Packing list & schemes.
- Acceptance criteria.
- Inform concern for any defects - Details of report.
- Collect modification details. - Fabrication drawings.
- Stock the material as per packing list.
- Room wise segregation.
- Dry mock-up - Schemes.
- Room wise numbering for identification.
- Dismantling of mock-up.
- Setting out.
- Shift to work location.
- Shift to stock yard.
- Actual assembly at work location.
- Slab rebars & M&E works.
- Final checking (Pre pour check) - Check list.
- Concreting - Pour card.
- Post pour check.
- Leveling and finishing.
- De-shuttering
- Removing pins and wedges.
- Removing wall ties.
- Removal of wall panels.
- Removal of deck panels.
- Cleaning of panels.
- Fixing of working platforms with brackets.
- Erection of Safety posts / rails.
- Applying Form release agent.
